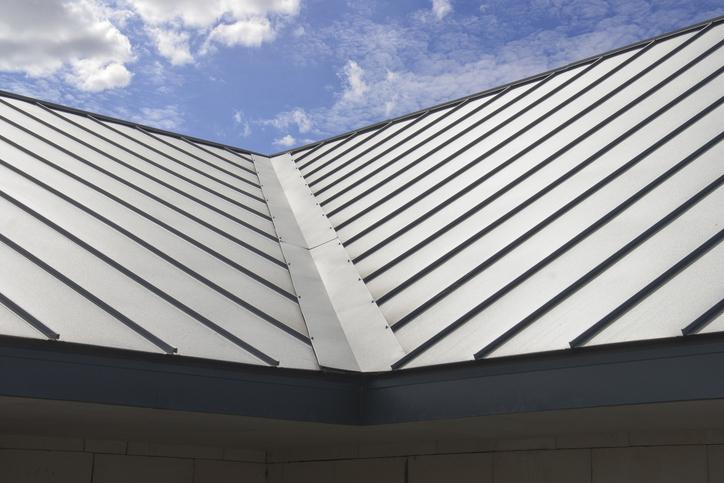
How to Install a Metal Roof: A Step-by-Step Guide
Metal roofing has become increasingly popular due to its durability, energy efficiency, and modern aesthetic. Whether you’re installing a metal exterior on your home, barn, or shed, it’s a great investment that can last for decades. While professional installation is recommended for most homeowners, understanding the process can help you decide whether to tackle it yourself or hire an expert. Here’s a step-by-step guide to installing a metal roof.

Why Choose a Metal Roof?
Metal roofs are an excellent choice for their durability, energy efficiency, and low maintenance. They can last 40–70 years, far longer than traditional asphalt shingles, and are highly resistant to harsh weather conditions, including heavy snow, rain, and wind. Metal surfaces reflect solar heat, reducing cooling costs in warmer months, and are compatible with modern insulation techniques for year-round energy savings.
Available in various styles and colors, metal offers a sleek, modern aesthetic that enhances curb appeal. Additionally, they are environmentally friendly, are often made from recyclable materials, can be a cost-effective roofing service, and are a sustainable investment for residential and commercial properties.
Prepare Your Tools and Materials
Before starting, gather all necessary tools and materials to ensure a smooth metal roof installation process.
Tools
- Measuring tape
- Chalk line
- Drill and metal screws
- Snips or a metal cutting saw
- Safety gear (gloves, goggles, and harness if working at heights)
- Ladder or scaffolding
Materials
- Metal panels
- Underlayment (synthetic or felt)
- Flashing
- Ridge caps
- Fasteners (metal screws with rubber washers)
Double-check measurements to ensure you have enough materials for your dimensions.
Remove the Old Roof (If Necessary)
If you’re replacing an existing roof, remove old shingles or other materials down to the sheathing. Inspect the deck for damage, such as rot or holes, and repair as needed. A solid, clean surface is essential for a successful installation.
Install the Underlayment
Underlayment acts as a barrier to moisture and provides an additional layer of protection.
- Roll Out the Underlayment: Start at the eave (bottom edge) of the roof and work your way upward.
- Overlap the Edges: Ensure each row overlaps the previous one by at least 4–6 inches to prevent water infiltration.
- Secure the Underlayment: Use staples or nails to secure it to the deck, ensuring it lies flat without wrinkles.
Attach the Metal Panels
The main part of the installation involves laying and securing the metal panels. Follow these steps carefully:
- Start at the Eave: Begin at one corner of the roof and lay the first panel flush with the eave and side edge.
- Secure the Panel: Use metal screws with rubber washers to fasten the panel to the deck. Place screws about every 12 inches along the ribs (raised ridges of the panel).
- Overlap Panels: Install the next panel, overlapping the edge of the first panel according to the manufacturer’s guidelines (usually 1–2 inches). Secure it similarly.
- Repeat Across the Roof: Work your way across the roof, ensuring each panel is properly aligned and secured.
Install Flashing
Flashing is critical for preventing water leaks at seams and edges.
Around Vents and Chimneys
Cut the flashing to fit snugly around any penetrations, such as vents or chimneys. Secure it with screws and seal with a waterproof caulk.
At the Valleys
Install valley flashing where two sections meet, ensuring water flows smoothly off the roof.
Add Ridge Caps
Ridge caps cover the peak and provide a finished look while preventing water infiltration.
- Position the Ridge Cap: Lay the cap along the peak, ensuring equal overlap on both sides of the roof.
- Secure the Cap: Use metal screws to fasten the cap, spacing them about every 6–8 inches.
- Seal the Edges: Apply a waterproof sealant along the edges for added protection.
Inspect and Clean Up
Once the roof is fully installed, perform a thorough inspection to ensure all panels and fasteners are secure. Check for gaps, misaligned panels, or exposed screws. Clear the surface and surrounding area of any debris, such as scraps or old materials.
Tips for a Successful Installation
Safety First
Always wear safety gear and use a sturdy ladder or scaffolding. Avoid working on the roof during adverse weather conditions.
Follow Manufacturer Instructions
Panels and accessories may have specific installation requirements, so consult the manufacturer’s guide for best practices.
Work With a Partner
Installing panels can be cumbersome, so having an extra set of hands can make the process smoother and safer.
Partner with Reliable Roofing Services
Installing a metal roof requires careful planning, precision, and attention to detail. While it’s a labor-intensive process, the result is a durable, low-maintenance surface that can last for decades. If you’re unsure about any part of the installation or working at heights, it’s best to consult with or hire a professional contractor to ensure the job is done right. With proper installation, your new roof will enhance your property’s value and withstand the elements for years to come.

