I realize there is probably a few of these guides floating around, but here is another quick-and-dirty on how to switch from a free wordpress.com blog to a hosted wordpress blog (wordpress.org) with your own website name. The benefits of doing this are great, but I assume you already know them since you’re looking for a way to switch out of your free ‘http://johndoe.wordperss.com‘ blog to a more professional and versatile ‘www.johndoe.com‘.
1. Get a domain name: You can buy a .com name from anywhere. However, a .ca name is regulated by the Canadian Internet Registry Authority (CIRA). Only certain domain registrar’s are approved by CIRA to sell .ca names. You can go to CIRA.ca and see a list of approved registrars who can sell you a .ca name. My recommendation is to go with one that can give you both a domain name and a good hosting package so you can keep both under the same roof for easy management.
You can try godaddy.com. They are one of the larger ones, but they have annoying up-sell ads at every step of the way and all over your account management screen whenever you login to work on your website.
I prefer Bluehost, but they can’t register .ca accounts, so I curently have my domain from lowcostdomains.ca (not recommended, they’re very slow to respond to support questions), and it’s being hosted with Bluehost.com. Bluehost has 24/7 online chat support, and they’re very quick at answers and guiding you through doing anything you need to do (including how to set up your non-bluehost domain to be hosted with a bluehost account). Besides, Bluehost has the latest wordpress right on their hosting account, so all you do is a one-click install and voila!
–
2. Get a hosting account: Already mostly covered above. If you are looking at options other than GoDaddy or Bluehost, there is a list on wordpress.org of all hosting companies that have the minimum requirements to handle the wordpress install.
–
3. Install WP software from WordPress.org on your hosting account: If it’s not already offered as a built-in option from your selected hosting company, download it from wordpress.org then upload it to the public_html directory in your new hosting account.
–
4. Download a backup of your existing free wordpress.com blog: Go to ‘Tools’ in the admin menu of your old blog. Click ‘Export’. Select the directory (e.g. your desktop) you want to plop the file in, then follow the on-screen directions.
–
5. Upload the backup into your new wordpress.org hosted blog: Go to ‘Tools’ in your new-blog admin menu. Click ‘Import’. Follow instructions and upload the file that you just exported from the old blog. You will now have all your posts and comments from the previous blog appear on your new blog.
–
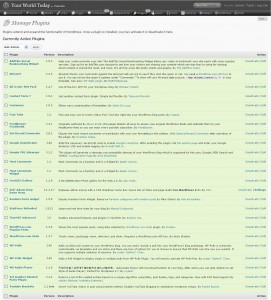
6. Go ahead and take your new blog for a ride! Unlike wordpress.com, a wordpress.org blog lets you install any widget or plugin your heart desires! You should know that you will not see many of the widgets you are used to from the previous free wordpress.com admin panel. You will have to download them or something similar (or better!) from the widget and plugin directory on wordpress.org. Click the image below to see a list of the plugins I use for YourWorldToday.ca.
————————————–
If you want to carry your traffic with you from the old blog to the new blog (redierct):
If you have built some traffic that frequents your old (free) wordpress.com blog, then search engines and other sites will have lots of articles/references linking back to your old blog. You want those to go directly to your new blog until all the search engines refresh their links and you get a chance to update all the directories and sites that you have used to promote your old blog.
To do this, you will need to perform a little trick to your old wordperss.com blog, since there is no straight-up option from the admin menu to allow this. Don’t worry though, it’s not that hard and there is a guide by wordpress staff available at http://support.wordpress.com/domain-mapping/redirecting-your-blog/.
Currently, wordpress.com lets people point their own domain (website name) to the wordpress.com blog. So, when I bought the name YourWorldToday.ca, I could have pointed that name to my free wordperss.com account so that I don’t have an unprofessional looking address like “http://johndoe.wordpress.com“. We are going to use this ability to do our little trick.
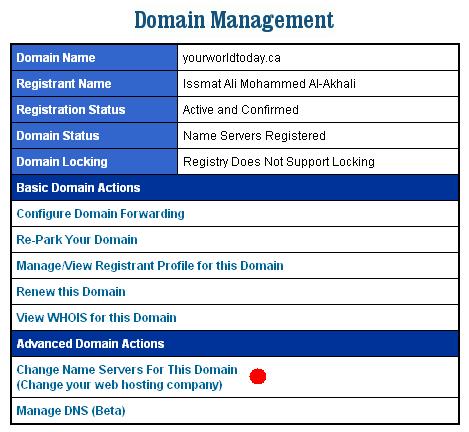
1. Point new website name to old blog: This is done by changing the ‘nameservers’ of my new domain name to the wrodpress nameservers (supplied by WP). Changing the nameserver of the new domain name is done through the admin panel of the Registering company you used to buy your domain name. I find the name ‘nameserver’ a bit intimidating for a non-techie, so let’s go ahead and refer to those as ‘arrows’ from now on, mmmkay?

–
2. Tell old blog to recognize your new website name: Once you point the “arrows” of your new domain name to the old wordpress.com blog, you go to your old blog admin panel, choose ‘Domains’ from the ‘Upgrade’ menu, type the address of your new domain name in the ‘Add Domain’ box, and click on ‘Add Domain to Blog’. If your “arrows” are pointing to the blog correctly, the next screen will give you the option to ‘buy a domain’ (or something like that). Click that option and spend $10 via Paypal to get 10 WordPress credits (no way around this. It will give you a year’s worth of redirection, which can be extended for another $10 each year).
Note: If the ‘buy’ option doesn’t come up, don’t panic. Sometimes it can take up to 72 hours for the ‘interweb’ to recognize that the “arrows”of your new domain are now pointing to a new place. In most cases, it doesn’t take that long (mine switched within 2 hours). You can also double check that you entered the wordpress nameserver addresses corectly in your domain’s manager window. WordPress won’t give you the ‘buy’ option unless it can recognize that the “arrows” of your domain name are pointed at it.
–
3. Connect new website name with old blog: Now that your arrows are pointed correctly, and you paid the 10 bucks to WordPress, you will have the option to ‘put blog here’ when you go back to the ‘Domains’ page in the ‘Upgrade’ menu of your old blog admin panel. Click the option and you will now be able to use ‘YourDomainName.com’ to get to your old wordpress.com blog.
–
4. Pull a Brutus and stab the old blog in the back: Now comes the trick! Once ye olde WordPress.com blog is all comfortable and cozy under the new domain name, we’re going to go behind its back and change up those “arrows” again and make them point to where we REALLY want them to point: our new blog! To do this, just get the nameservers of your hosting company account (For Bluehost: ns1.bluehost.com and ns2.bluehost.com), and enter them instead of the WordPress nameservers that we entered in step 1. Wait again for the customary 2 to 72 hours while the interweb refreshes the direction of your arrows, and now you will have your new website name pointing to your new blog, and any visitors to your old blog will automatically be redirected to your new blog.
You don’t need to brace for a Shakespearean epic plot for revenge by WordPress.com. They’re cool with it.


