An enthusiastic group of gardeners attended a Vermicomposting Workshop in Parrsboro in early November, to learn the art of composting with red wiggler worms. The workshop, presented by Del Seto, of Side-By-Each Farm (https://www.facebook.com/pages/Side-By-Each-Farm/), demonstrated how to transform your kitchen waste into a nutrient-dense compost.
Del’s passion for red wigglers was contagious and several workshop attendees are now anxious to start vermicomposting in their homes.
According to Del, it’s simple…All you need is:
(1) A home for the worms. The worm bin can either be a plastic container, or home-made from plywood, though she recommends the rubbermaid. A good size for a bin is about 50L. Aeration holes should be cut or drilled into the top of the bin and around the perimeter of the top.
(2) Bedding. Newspaper strips, cardboard (clean – without inks, tape, etc.), shredded fall leaves, chopped up straw, sawdust, or peat moss (moistened) can be used.
(3) And of course, the worms! (*Info. on ordering worms at the end of this blog article).
Once you are ready…
Your worm bin can be located in a number of places – the kitchen, garage, basement, closet. Wherever you choose, the location should be a dark, well-ventilated room, as long as the room temperature does not drop below 4 degrees Celsius.
Red wigglers will eat half their weight in food scraps every day. So for every pound of red wigglers, feed them half that weight in food waste. Feed them once or twice a week. Bury the food waste by pulling aside some of the bedding, add the waste and then cover it up. Del suggested wrapping the food scraps in newspaper, which she referred to as their “lunch”. Each time you feed your worms, choose a different location. In other words, rotate where you give them their lunch.
If you are doing it right, there should be no odor. If you are not, it is easy to fix, usually by adjusting moisture, or oxygen levels (so, by simply adding more bedding in many cases, or by taking the lid off the bin for a bit). Del sometimes puts her bin by an open window, so that her worms get plenty of air circulation. She also stores her food scraps in the refrigerator to avoid fruit flies and odor.
What to feed your worms:
-Egg shells (crushed is better), coffee grounds and unbleached filters, fruit and veggie peelings, tea bags (staples removed), breads, grains, peanut hulls. Do not put the following in your worm bin: Dairy products, fats, meats, bones, oil or oily foods (e.g. – peanut butter).
Harvest the compost from your bin every 2-3 months, when the original bedding has turned into an indistinguishable mass and the food waste has disappeared. To harvest, move the contents of the bin to one side, and add new food and new bedding on the opposite side. The worms will leave the old pile for the new one in search of food. After a few days, remove all the finished castings. A trick that Del suggested, is to put a light over the bin when you are ready to harvest your compost. The light drives the worms deeper into the pile, making it easy for you to remove the worm castings at the top of the pile. Sift out any contents that are not fully decomposed and leave them behind. You can use your worm castings (vermicompost) right away, or store it in a bag or bucket with a cover to keep moisture in.
Why go through all of the effort?
Worm castings are a nitrogen-rich natural fertilizer, which is totally organic and one of the best soil additives / plant food known to humankind. Worm compost is very concentrated, so a little goes a long way. You can add it directly to your garden, or mix some with potting soil. You can sprinkle some on top of the soil of house plants. In addition to containing unusually high populations of beneficial microorganisms crucial to healthy root systems, castings also naturally aerate the soil, retain high moisture levels, and release nutrients slowly over time. If these aren’t enough reasons, have you checked out the price of worm castings lately? You can save a tonne of money by making your own! Besides, it is a fun and rewarding experience to vermicompost at home!
Sourcing your worms:
Unfortunately we could not locate a source for red wigglers in NS.
You can purchase red wigglers from: http://www.cathyscomposters.com/
However, please note that Cathy is unable to ship to NS until the weather warms up in the Spring.
Before you order, consider how much kitchen waste you produce and remember that for every 1/2 lb. of waste, you will need 1 lb. of worms. Try to get a group of folks together to place an order and save when buying bulk. Most start out with 1 lb. of worms. Your worms will reproduce and as your population grows, you can add more bins, or give some away as a starter to your friends. Good luck!
A great resource for learning more about Vermicomposting is:
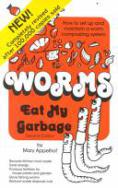
Worms Eat My Garbage by Mary Appelhof.
Blog written by Su Morin, The Ecology Action Centres’ Community Food Coordinator for Cumberland County, NS.


