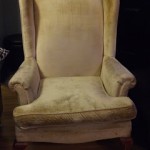
As you read in last week’s blog (wing chair makeover, part 1), I picked up an old wing chair in desperate need of some lovin’.
Armed with $40 of fabric (what a deal!), some “how-to” information from various other blogs, and more than a bit of stubbornness, I started the makeover.
After deconstructing the chair, it was time to put it all together again…hopefully with an end result that was better than where it started!
Take each of the old pieces that you numbered and lay them out on your new fabric to cut a pattern for each.
Start putting them back on the chair in reverse order (from how you took them off). Aren’t you glad you listened to my advice and numbered and marked them all?? I was also really glad I took photos along the way, because it’s easy to forget exactly how each piece was attached….
Sounds easy enough, right?
A few tools you need for this part of the job include a good pair of fabric scissors, some stick pins and a sewing machine. There was only a little sewing in this job…the piping, the wings and the seat cushion.
You’ll find a bunch of suggestions on easy ways to make piping on-line. Here’s the one I used —http://sewmamasew.com/blog2/2008/07/summer-sewing-perfectly-portable-cushion/.
The best tip for the rest of the sewing is that, just as you did elsewhere, take the old pieces that were sewn together and carefully take the stitches apart, cut your new fabric from the pieces to make a pattern, and then sew them together in the same way.
Another key tool for this job is a staple gun and lots of staples. Remember the thousand and one staples you ripped out? Well…I think I might have put a thousand and two back in! I invested in an electric staple gun ($30) and it was work every single penny even if I were to never use it again.
A good tip is to also have a glue gun on hand. There are lots of pieces that are “tucked” into parts of the chair…the backs, sides, arms…etc. A little dab or two from the glue gun will ensure these pieces lay flat, stay put and look good.
For the back, I decided not to reuse the big scary metal teeth that were holding the old fabric in place and opted for little metal upholstery tacks instead (you need a hammer to gently tap these in place). These are readily available at places like Canadian Tire for about $4 for a pack of 40.
Finally, where the chair calls for a straight, tight edge of fabric (back of chair and outside below the curve of the arms), cut a length of cardboard (part of an old box will do!), wrap the fabric over it and staple it to the chair, then fold the fabric down, pull taut and voila…a nice straight edge!
So now that you know the steps to putting it back together again, here’s a look at my finished product. Remember, this was never meant to be the quality of a professional job, but instead a DIY that would still look good for a much lower cost.
For more about rouge, visit www.littlered.ca or check out past blogs at www.justalittlerouge/blogspot.com
Source: http://justalittlerouge.blogspot.com/2011/09/wing-chair-makeover-part-2.html


