
Did you know every time it rains sediments are washed into our streams, rivers and lakes? The faster the water moves, the larger the amounts of sediments pulled down into the water stream.
This process is the result of gravity!
Gravity moves the water and the water mixes with soil and sediments. The sediment is composed of both living and non-living material such as soil, sand, gravel, dirt and organic material. As the speed of the water decreases, the heavier sediments drop out first. This process causes erosion of riverbanks and creates deposits of sediment called sand bars and deltas. This is how our waterways get their crazy, funky shapes! It is a continual process of eroding and depositing where riverbanks are cut and sandbars are deposited.
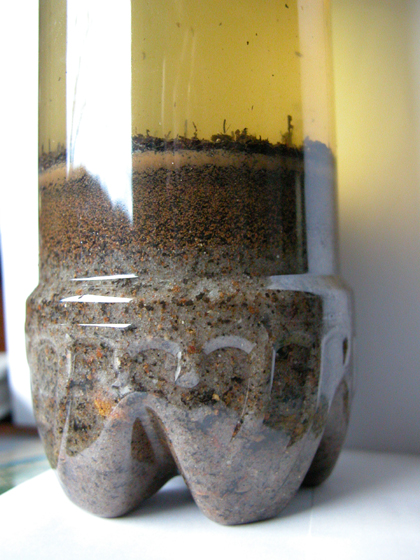
In this issue of Let’s Discover you’re going to learn more about water and how it works by by creating your very own Sediment Jar. Sediment Jars are a great way to model and display the effects of water and how sediments are suspended and then deposited. As the solution spins, more energy is added and mixes the various sediments. As it slows, the materials drop out in layers causing the definition of the sedimentary layers. Try this Let’s Discover experiment and let us know what you learned!
Materials:
- Recycled clear plastic bottle with a cap – small or large (16-24 oz)
- Water
- Gravel from your yard, aquarium or pet store
- Sand from a hardware store, pet store or garden center
- Organic dirt from a field or outside
- Fine sand from hardware store, pet store or garden center
- Organic material (i.e. grass clippings, torn newspaper, leaves, etc.)
Procedure:
- Fill the bottle almost to the top with water; make sure to leave enough room to add the sediments (approximately 3-4 inches).
- Add gravel to the bottle of water creating a gravel layer about 1.5-2.0 inches thick.
- After adding the gravel, add approximately three handfuls of sand.
- When finished, add approximately six pinches of organic dirt.
- Then add approximately one handful of fine sand.
- Finally, add at least two or three items of organic material.
- Place the cap on the bottle.
- Shake and twist the bottle to simulate a rainstorm.
- Place the bottle on a table to observe. Record what you see.
- Leave the bottle alone for at least ten minutes, observe the layers within the sediment jar, and record what you’ve seen.
Questions:
- Draw a picture or create a graph that shows the relative thickness of each layer.
- Why do the layers arrange themselves the way they do after a few days?
- How might the results of this experiment change if it was done with soil dug up in your back yard?
BONUS step: Visit our new exhibit Ocean Bound! on now at the Discovery Centre and start your journey to becoming a #WaterWarrior. Throughout the Exhibit, you’ll learn more about other materials that flow or settle, and just how important water is to our world. Then tell us what you learned – post a video, photo or suggestion for conserving water and you could win a family guest pass! Ocean Bound! is on until September 6.
For more great things to discover – visit the Discovery Centre on Barrington Street in Halifax, check out their website or join them on facebook