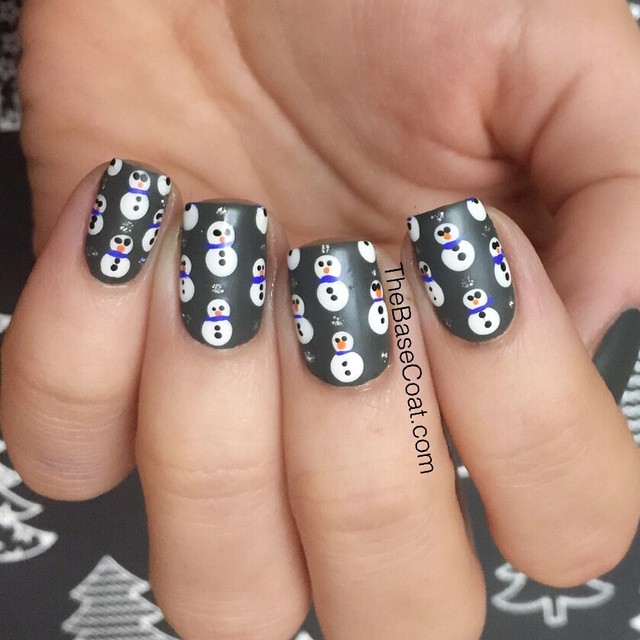
I used:
- Essie Power Clutch (Grey)
- Essie Butler Please (Blue)
- Essie Roarrrrange (Orange)
- Zoya Purity (White)
- Zoya Raven (Black)
- China Glaze Glistening Snow (Silver Glitter)
- Glossy and Matte Top Coat
Tutorial for Snowman Pattern Nails!

1. Paint your base color. Let dry.
2. Using a large dotting tool, create the base of your snowmen with a white polish. Try to space them out like the image above. (There is a tutorial on how I spread out my dots on my Instagram feed from a few months back)
3. Using a smaller dotting tool and your white polish, add dots to slightly touch the tops of the dots you just created to become heads for your snowmen.
4. Using a very tiny dotting tool (I actually used a sewing needle) and a black polish, create dots for the eyes and buttons.
5. Using your small dotting tool or sewing needle and an orange polish, create a dot under the eyes for the nose.
6. Using a small nail art brush and a blue polish, create a line between the head and body of each snowman for a scarf.
7. With a small dotting tool or toothpick and a glitter polish, place dots between your snowmen as ‘snowflakes’ in the background. Seal in your art work with a good quick dry top coat.
8. Post a picture of your nails to Instagram and use #thebasecoat so I can see your creations!